
#5: A practical introduction to OpenFOAM for Researchers & Engineers
Step-by-step install guide for Windows WSL included!

Hello fellow Compute!
Thank you for being here. It means a great deal to have my work and articles be read by you each week. 🙏
OpenFOAM is a popular open-source simulation tool for a wide range of fluid problems. However most beginners struggle to get started, especially if they've never used open-source software before. Furthermore, there is no graphical interface (GUI) which increases this difficulty.
I remember how challenging it is to be a beginner and have empathy for you starting your journey into the world of CFD and open-source software. I struggled to find a good beginner tutorial online with enough information to answer my beginner-type questions, so I created this myself to help others like you.
Today’s agenda:
What is open-source software and OpenFOAM exactly?
How does OpenFOAM work (high-level view)
Your first installation (Windows wsl / Ubuntu)
Running your very first case, step-by-step
What next?
Let’s go!
1. What is open-source software and OpenFOAM exactly?
Open-source software is software (more accurately code) that is made ‘open’ and visible to the public by the developers themselves.
OpenFOAM is released with a GPL v3 licence. In other words, It’s free to use, modify, distribute and even use for real research.
Why?
It encourages an open, cross-collaboration between developers so it can get better across industry. The wider the application areas, the greater reach it has.
The software gets more features built on top of it’s base functions, making it richer and potentially more valuable for many more users.
It was created and is being driven by a mission to make CFD accessible to all.
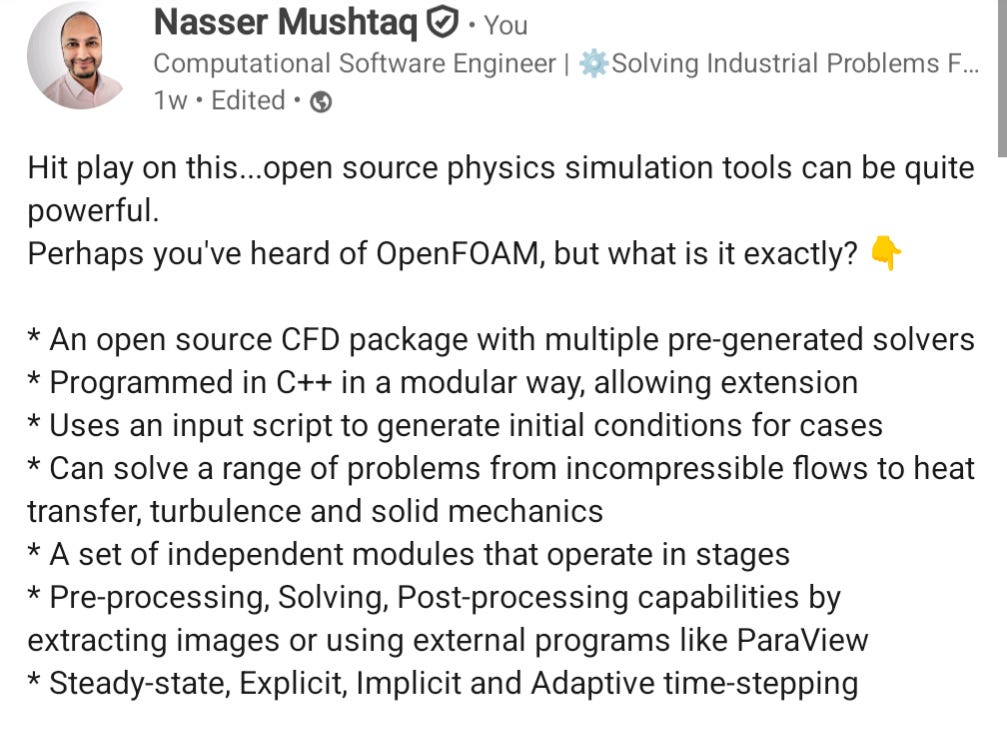
I wrote a summary about OpenFOAM in a post on Linkedin, highlighting its’ main features:
Whilst this is all great, the biggest barrier for beginners is the fact there is no GUI (you can get third-party ones but they aren't great in my opinion, very under-developed).
The other issue is that most, if not all, tutorials available out there are quite superficial, showing you how to setup simple cases with all the odd, clunky bits and often provide NO context on what the code is doing or what the results show!
I hope to bring clear, valuable insights and content to enable you to make real progress in your CFD journey, starting here!
2. How does OpenFOAM work (high-level view)

OpenFOAM is really a set of ‘Utilities’ (that work on the setup data i.e. CAD model, meshing etc.) and Solvers (that work on the initial and resulting data), ultimately providing ‘results’ that can be interrogated in raw form (numbers are great, but also often tiny time-step to time-step) or using a visualisation tool like ParaView.
It helps to start with what we’re dealing with in the simulation domain:

With this 3D representation defined within OpenFOAM (2D is just Y here being set to 0), as a User you need to map appropriate values and settings to each of these labelled items to run a case successfully.
OpenFOAM operates in a linear fashion:
Create a case folder with directories as specified in any tutorial folder. These should be: ‘0’, ‘constant’ and ‘system’ (initial conditions, constants / data for solver, simulation run settings respectively). The parameters within each file located in the various folders can be edited as required.
A mesh for domain and geometry is created using a meshing utility - ‘blockMesh’ is a simple one.
A specific solver is run on the data like ‘simpleFoam’, which is a steady-state solver for incompressible flows.
Once the solving has completed, a full list of output folders will be created in the same case directory.
Create a new .foam file to open with ParaView.
While it appears to involve many steps, you get used to the way of working with practice.
3. Your first installation (Windows WSL / Ubuntu)
I installed OpenFOAM on Windows and most machines that Engineers and Researchers often have access to is a Windows machine!
You need setup Linux under windows (Ubuntu).
Start by launching command prompt or Powershell and type:wsl --installOnce you have installed and restarted the machine, you should be able to launch the Linux environment by returning to the command prompt or Powershell and typing ‘
wsl’

Next, follow the short guide on the following link to install OpenFOAM itself: https://www.openfoam.com/download/openfoam-installation-on-windows-10
Or:
1. Add the repository:curl https://dl.openfoam.com/add-debian-repo.sh | sudo bash2. Update the repository information:
sudo apt-get update3. Install preferred package:
sudo apt-get install openfoam2406-default4. Use the openfoam shell session, typing:
openfoam2406
Once done, type ‘openfoam2406’ (note version number, mine was 2406).
If successful you should see:
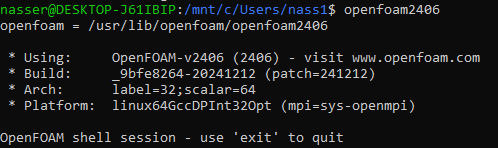
🎉 Congratulations, you have OpenFOAM installed on your machine!
You can also install ParaView, the visualisation app for post-processing results. Download here: https://www.paraview.org/download/

4. Running your very first case, step-by-step
Ok, so you have Linux running under windows, OpenFOAM installed and ParaView sitting and waiting for your first set of results!
The fastest way to get started is to copy an existing OpenFOAM tutorial case folder from their tutorials folder.
Navigate to your Ubuntu Linux folder in Windows Explorer:
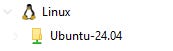
\wsl.localhost\Ubuntu-24.04\usr\lib\openfoam\openfoam2406\tutorials
Pick a basic case folder like incompressible\simpleFoam\pitzDaily and you should find 3 folders as below - 0, constant and system (explained in section 2 above). Copy these into your local OpenFOAM Windows folder.

In your command prompt, navigate to your OpenFOAM case folder in Windows, mine is cd mnt/C/Users\nass1\Documents\OpenFOAM\myFirstSimulation
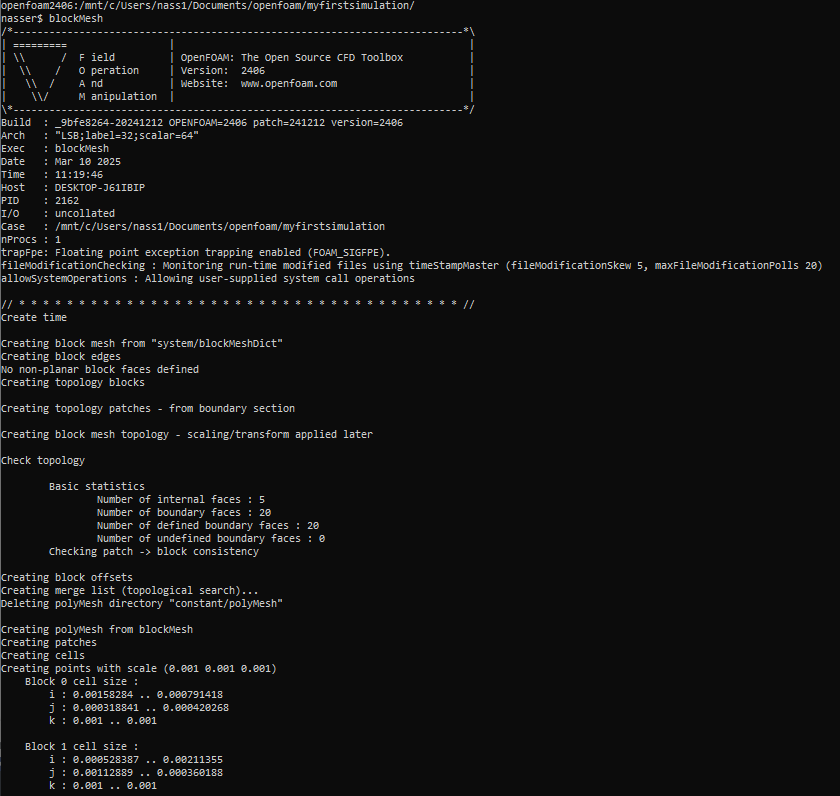
If you type ‘ls’ , you can get a list of items contained within the folder.Now you’re ready to begin the CFD process. Start by creating the geometry and domain mesh using the ‘blockMesh’ function. Simply call ‘blockMesh’ (case sensitive) and hit the Enter key, you should see the following:

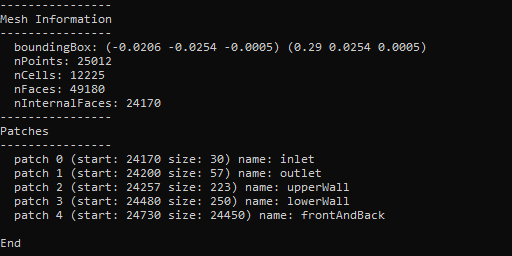
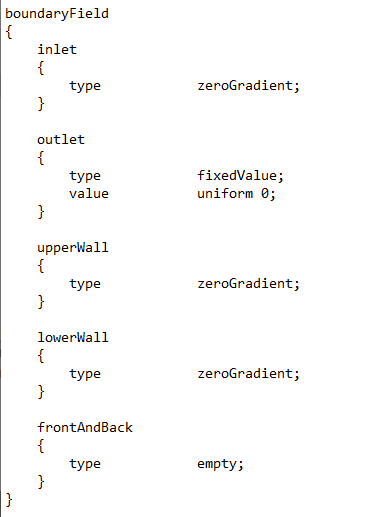
Note the following mesh information at the end. The names of the patches should match the names contained under the ‘boundaryField’ section of any input files (0 folder)
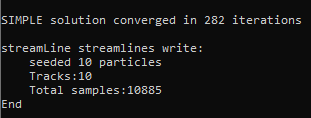
Type ‘simpleFoam’ to run the solver on the case, generating results for each time step run. You should see the following when done:
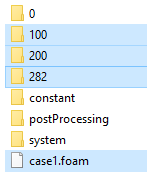
Create a .foam file with command ‘
touch’ and your desired filename for subsequent post-processing of the results. Your case folder should now look like this:
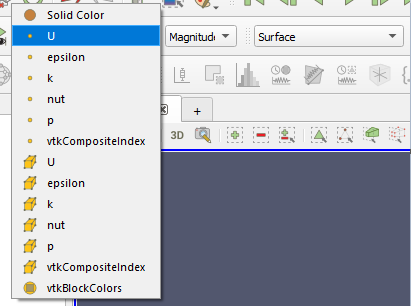
Finally, launch ParaView. Drag and drop your case file from the folder into the ParaView GUI. Click the ‘Apply’ button under the properties tab on the left-hand side by default. You can change the field quantity to plot from the ribbon bar, under the drop down fields as shown:


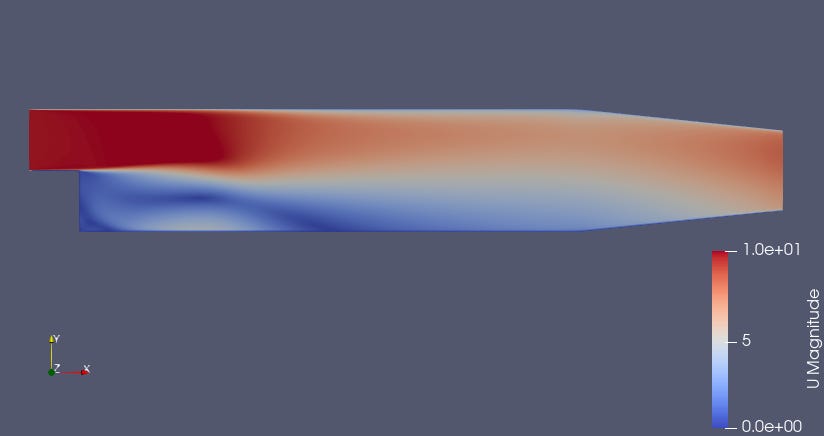
Velocity plot 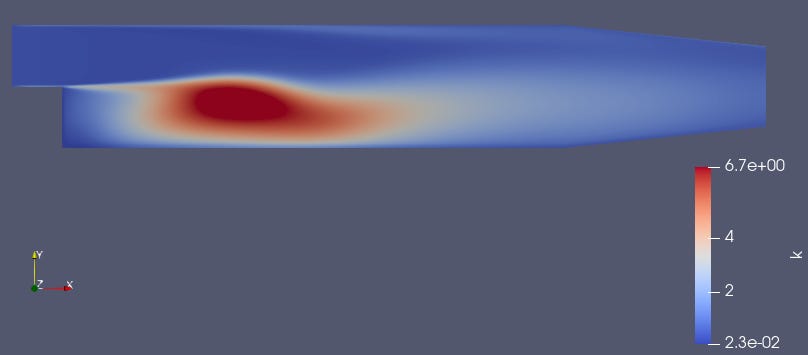
Tubulent kinetic energy plot


5. Where next?
OpenFOAM is a vast code base but has a community size to match! There are tons of incredible resources and many will take months or even years to go through. My advice is to take the time to learn the fundamentals of the code and how it works, with regular practice.
Official OpenFOAM documentation
https://www.openfoam.com/documentation/overview
Community tutorials
https://wiki.openfoam.com/index.php?title=Tutorials
Discussion forums for OpenFOAM users:
https://www.cfd-online.com/Forums/openfoam
CAD models with OpenFOAM tag in GrabCAD:
https://grabcad.com/library/tag/openfoam
CFD books:
An Introduction to Computational Fluid Dynamics: The Finite Volume Method, H. Versteeg (2007)
Computational Fluid Dynamics, T. J. Chung (2010)
Summary
I hope this post has been insightful and a good practical introduction to getting started on your journey with OpenFOAM!
Until next time.
- Nasser
Connect with me:
🙌 Follow me on LinkedIn: https://www.linkedin.com/in/nassermushtaq/
🎞 Explore my videos: https://www.youtube.com/@nasser_codes
📧 Send me an email: hi@nasserm.com
Disclaimer:
All content in this post and newsletter is my own and do not reflect the opinions and position of any employers, partners or associates.
Hey! What did you like most about this post? What could've been better? I want to improve so you're feedback is very important to me. Have a great day!