
Demystifying snappyHexMesh [Part 3]
Going from a rough to smooth mesh

If you’ve been following this series of snappyHexMesh (SHM) posts, you’ll know we’ve got the first resemblance of a mesh…


I wanted this to be a structured assessment of SHM’s potential for generating a good mesh for OpenFOAM.
But there are so many parameters and it can become a tedious game with lots of back and forth, so I created a few scripts to help me do this a little faster!
runOpenFoam(”blockMesh”, case_dir_wsl)
runOpenFoam(”surfaceFeatureExtract”, case_dir_wsl)
runOpenFoam(”snappyHexMesh”, case_dir_wsl)
…
The purpose of snapping
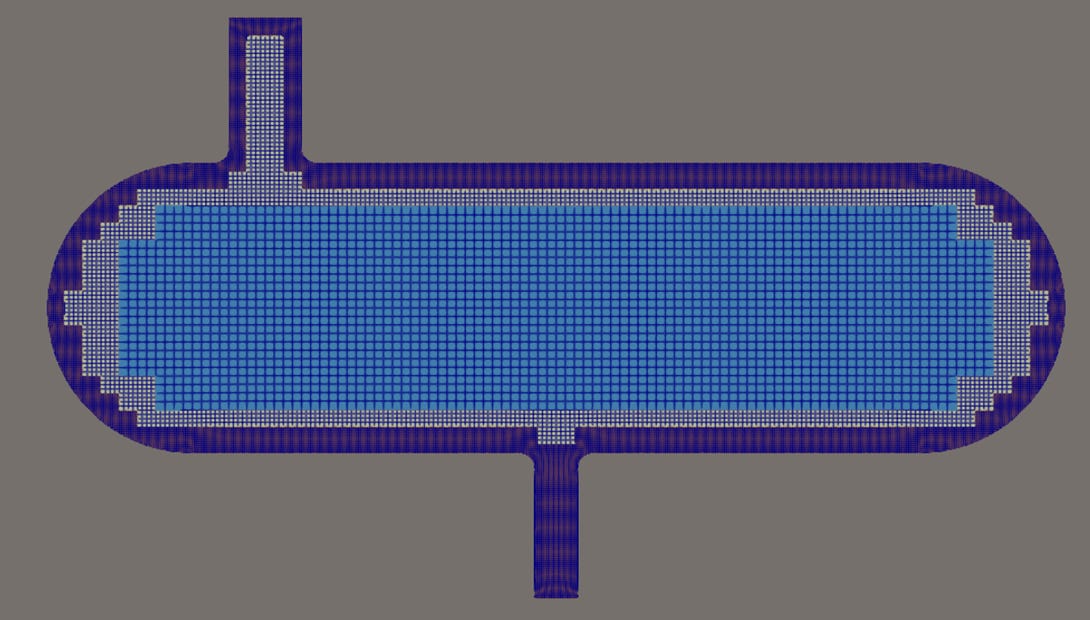
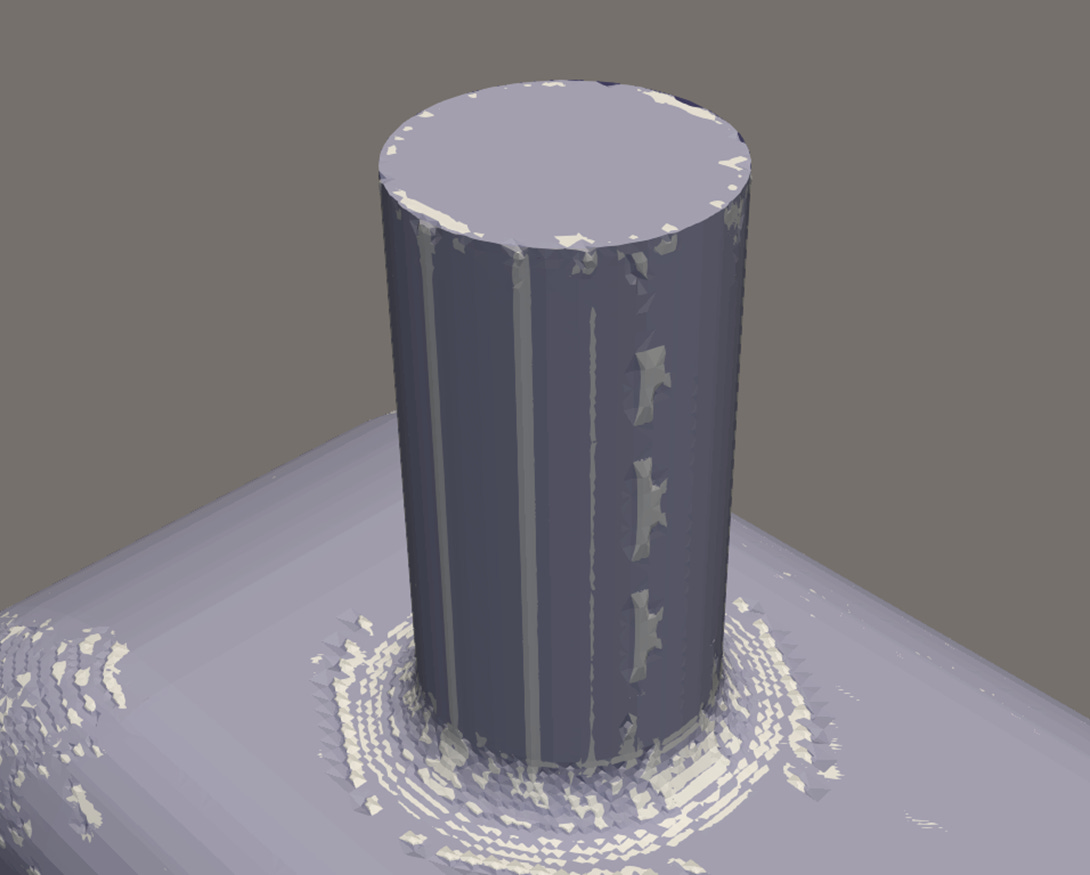
At the moment, we have a (partial) mesh that has many grooves, notches and generally undesirable irregularity (castellation) as below.
The snapping phase of SHM aims to move the mesh as close to the STL surface as possible.

If this goes wrong, the mesh will have quality issues such as holes, distorted cells and bad curvature.
Understanding the few parameters that actually matter is very valuable and allows you to generate a mesh with more confidence.
The snapControl parameters that truly matter
It’s important to note the snapping behaviour is dependent on the previous castellation stage.
To discover the needle-movers here, I had to sometimes take a step back in the process and refine the levels, particularly castellatedMeshControls > refinementSurfaces.level.
This gave me a more refined mesh near the surface of the STL geometry before snapping could take place.
snapControls > nSmoothPatch
Controls smoothing along the surface before the actual snapping
Increasing this generates a smoother result
snapControls > tolerance
Controls how far a mesh point is allowed to move to reach the surface
A larger tolerance gives a better result, but risks distorted cells
snapControls > nSolveIter
Controls how many solver iterations should be made
Increasing this gives greater accuracy but takes considerably longer
snapControls > nRelaxIter
How gradual snapping is applied
A lower number is more aggressive and leads to issues
snapControls > nFeatureSnapIter
Controls the alignment with feature edges
More important for sharp edge geometry
Increasing this results in sharper resolution
snapControls > explicitFeatureSnap
Whether or not the edges extracted with surfaceFeatureExtract should be used
Usually best to have this switched on in all cases
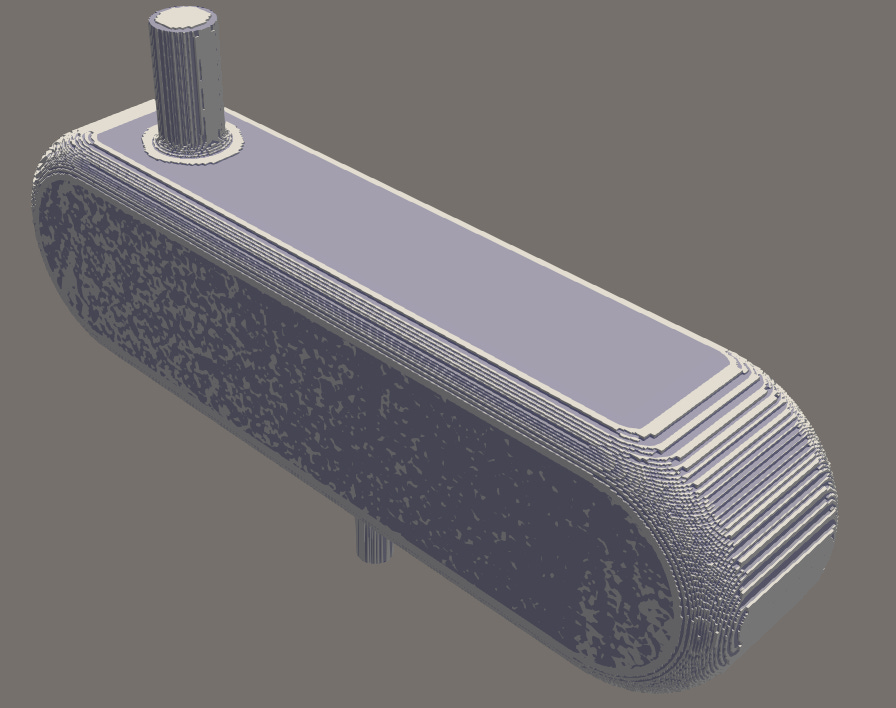
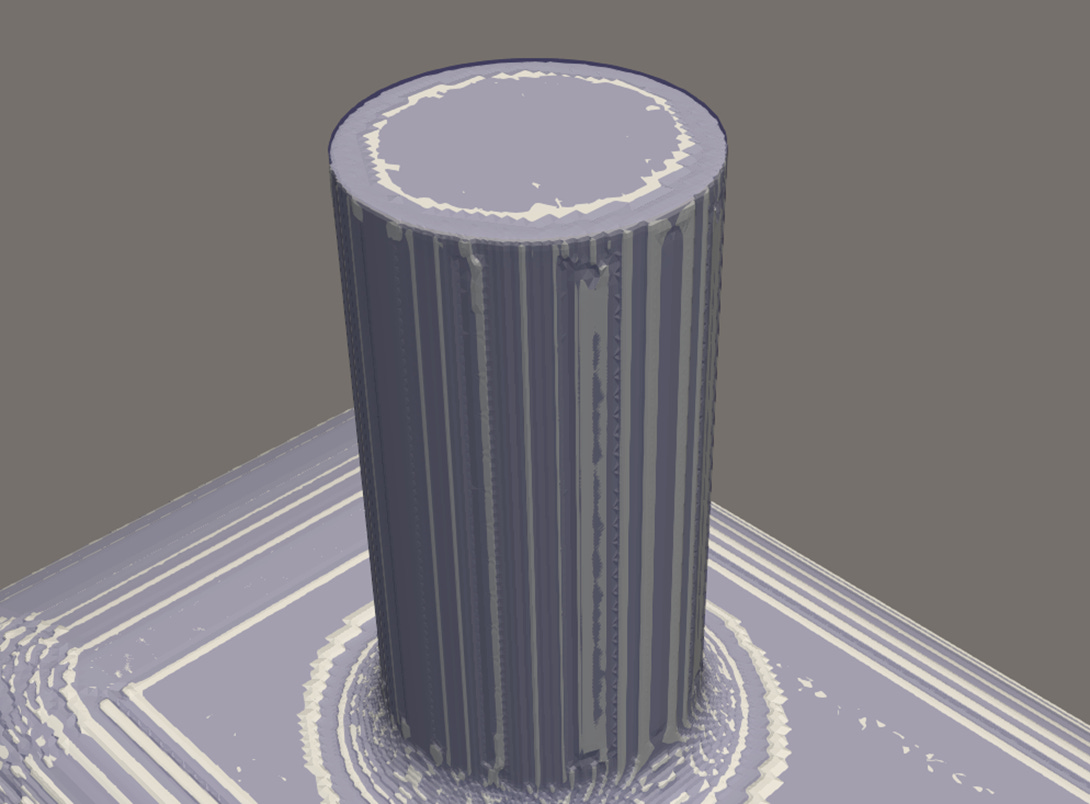
What we have so far…
A refined, castellated and snapped mesh.
You don’t generally tune the snapping parameters once it’s working well, provided you have a good working setup.
You’d be forgiven for thinking this is sufficient, but fluid moves all directions and the fluxes can vary dramatically along walls, with gradients usually being far greater here than anywhere else.
To resolve this, we need boundary layers and that’s exactly what the next (final stage) of SHM does.
Join me next week where I’ll share some more curious insights on how to use it and what matters most, so you can tune your meshes to great effect!
Help me to help you with snappyHexMesh…
I hope it’s been helpful so far to see my results, using numerous parameters on practical CAD geometry and their resulting effects.
But I can only go so deep and be so clear in a post like this.
There’s so much more to know in order to control SHM with confidence and clarity.
That’s why I’ve been creating a complete and concise manual on snappyHexMesh as part of my “OpenFOAM Diet” series, I launched back in September last year (2025).
And last time I made the manual available for free to upgrading / paid subscribers.
I’m reviewing this, so if you’re interested in it please answer the poll below to help me decide.
Hope to catch you next week! 👋